This guide explains how to configure and use Eleventex HelpDesk.
1. What the Module Does
The module gives customers and store admins a shared ticketing workflow inside Magento:
- Customers can create support tickets from their account.
- Customers and admins can exchange replies in a ticket thread.
- Attachments can be uploaded to tickets and replies.
- Admin users can manage ticket details such as status, priority, department, assignee, and related order.
2. Open Module Configuration
Go to:
Stores > Configuration > Eleventex > Help Desk
3. Configure the Module
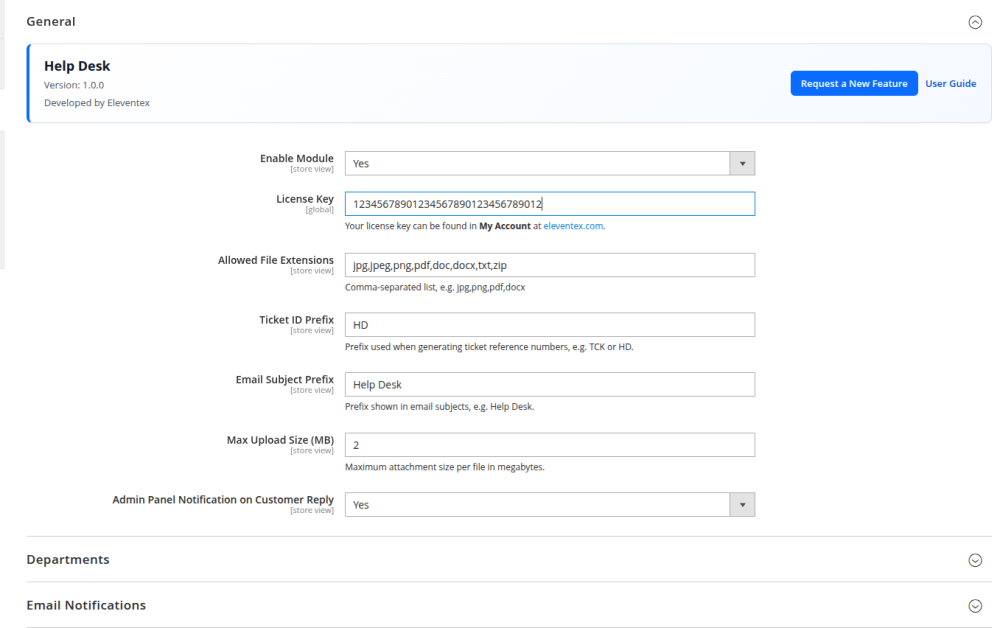
3.1 General Settings
In General, configure:
Enable ModuleSet toYesto enable storefront and admin Help Desk functionality.License KeyEnter the Eleventex license key if your project uses license validation.Allowed File ExtensionsEnter a comma-separated list such asjpg,png,pdf,docx.Ticket ID PrefixSet the prefix for generated ticket references, such asTCKorHD.Email Subject PrefixSet the prefix used in Help Desk emails.Max Upload Size (MB)Set the maximum attachment size allowed per file.Admin Panel Notification on Customer ReplySet toYesif admin inbox notifications should be created when a customer replies.
3.2 Department Settings
In Departments:
- Add each department name.
- Assign a default admin user to the department if needed.
This mapping is used when tickets are assigned by department.
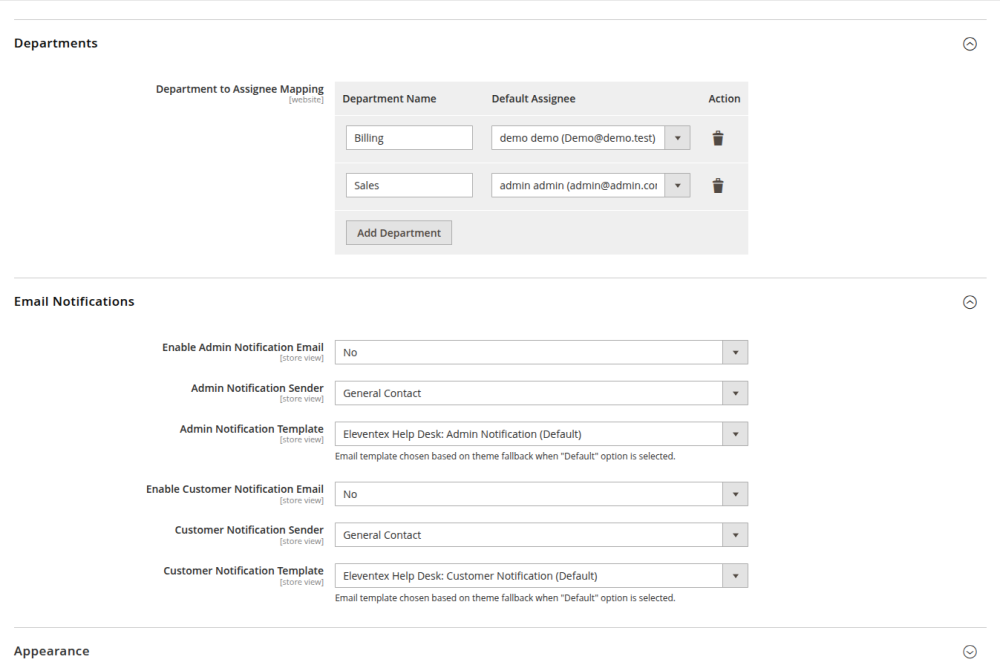
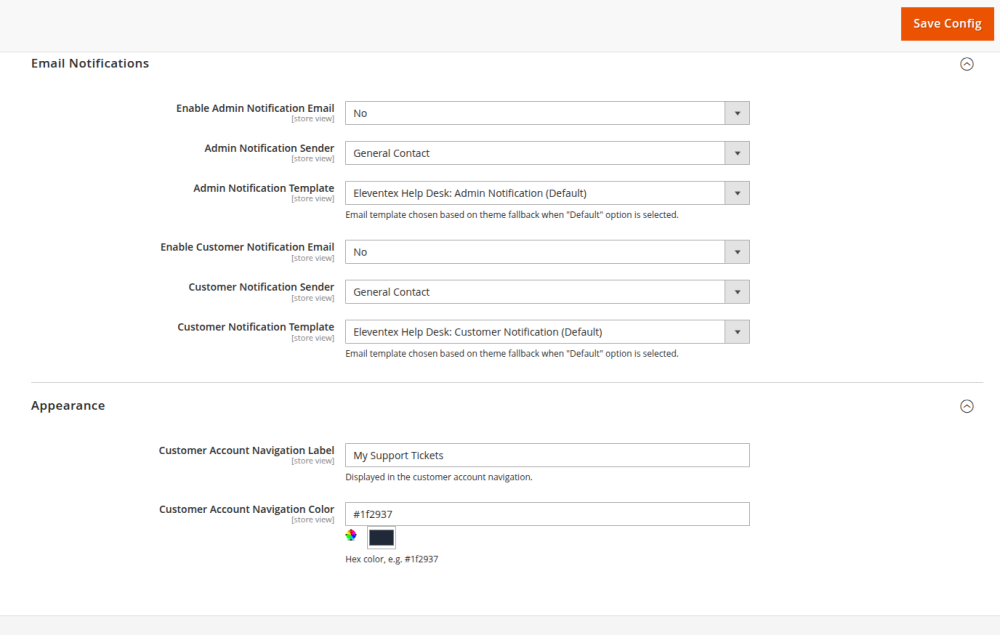
3.3 Email Notification Settings
In Email Notifications, configure:
Enable Admin Notification EmailAdmin Notification SenderAdmin Notification TemplateEnable Customer Notification EmailCustomer Notification SenderCustomer Notification Template
3.4 Appearance Settings
In Appearance, configure:
Customer Account Navigation LabelControls the label shown in the customer account menu.Customer Account Navigation ColorControls the color of the Help Desk account navigation entry.
4. How Customers Use the Module
4.1 Open the Help Desk
Customers go to:
My Account > Help Desk
This page shows the customer’s existing tickets.
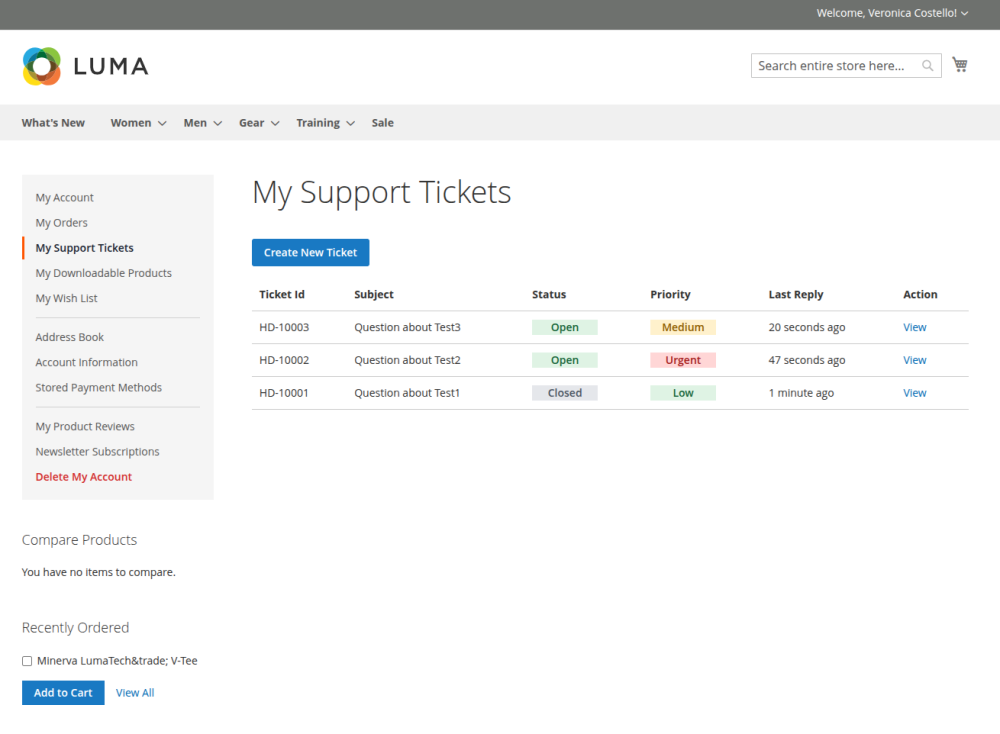
4.2 Create a New Ticket
- Click
Create New Ticket. - Enter:
SubjectPriorityDepartmentRelated Orderif applicableMessage- optional
Attachment
- Click
Submit Ticket.
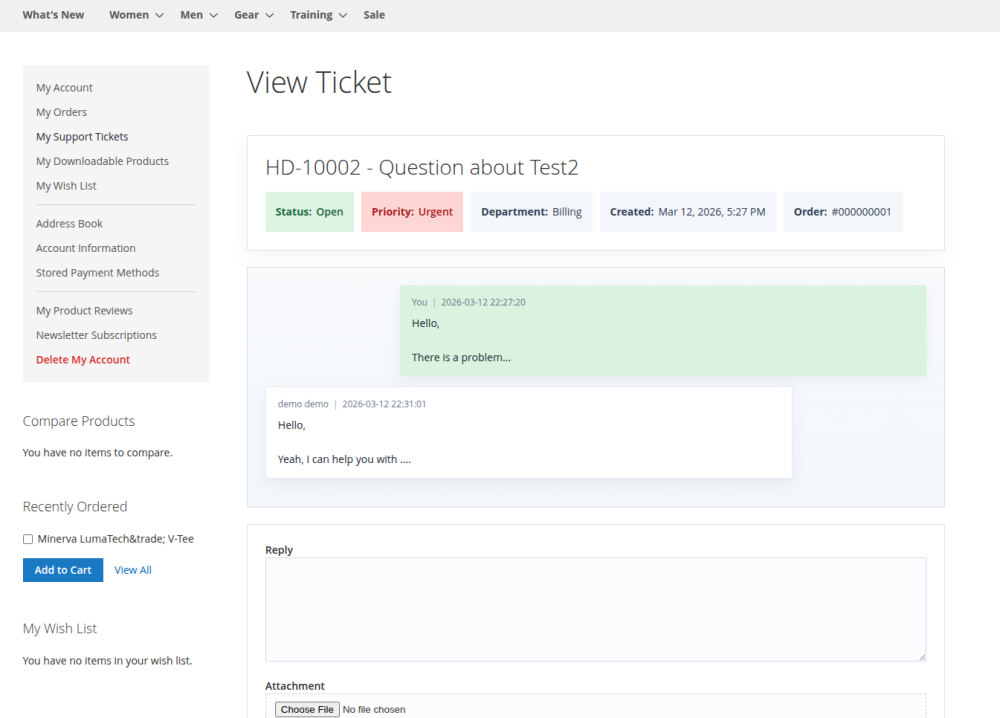
4.3 View and Reply to a Ticket
- Open a ticket from the Help Desk list.
- Review the ticket summary and chat history.
- Enter a reply message.
- Optionally add an attachment.
- Click
Send Reply.
If the ticket is closed, sending a reply reopens it automatically.
4.4 Close a Ticket
From the ticket detail page, click Close Ticket when the issue is resolved.
5. How Admin Users Use the Module
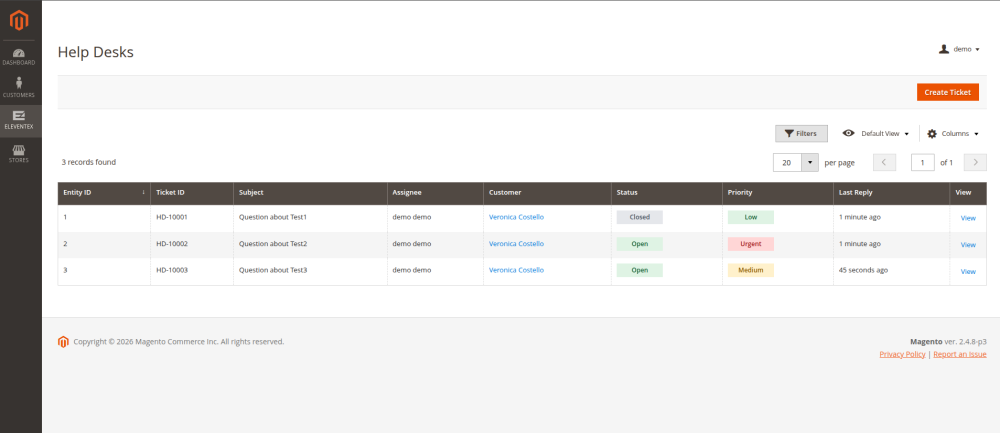
5.1 Open the Ticket Grid
Go to:
Eleventex > Help Desk
The grid shows ticket reference, customer, status, priority, and last reply time.
5.2 Create a Ticket from Admin
- Click
Create Ticket. - Fill:
SubjectCustomerStatusPriorityDepartmentAssigneeRelated Order- initial
Message - optional
Attachment
- Click
Save Ticket.
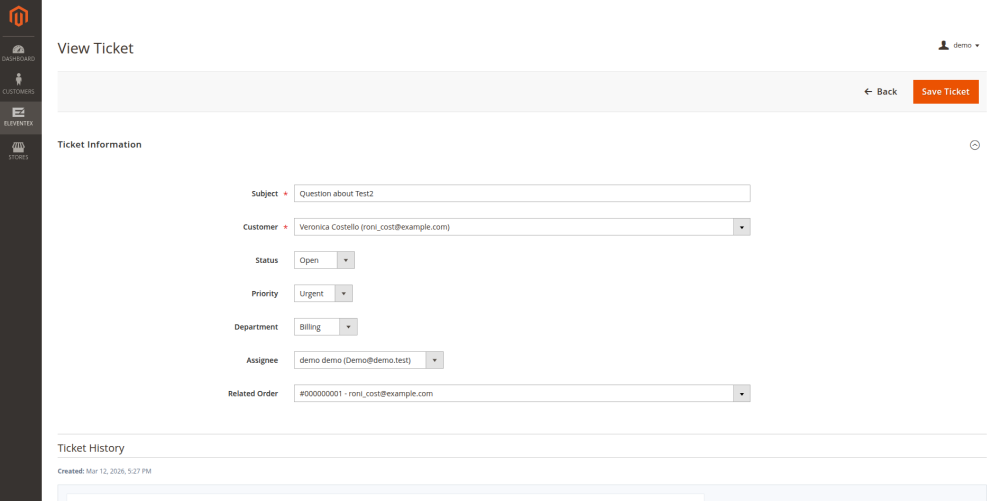
5.3 Edit an Existing Ticket
From the ticket form, admins can update:
SubjectStatusPriorityDepartmentAssigneeRelated Order
5.4 Reply to a Customer
- Open the ticket in admin.
- Review
Ticket History. - Enter a reply.
- Optionally attach a file.
- Click
Send Reply.
5.5 Review Previous Customer Tickets
The admin ticket view also shows previous tickets created by the same customer.
6. Attachment Rules
- Allowed file types come from
Allowed File Extensions. - Maximum file size comes from
Max Upload Size (MB). - The attachment note shown in forms uses the configured backend value.
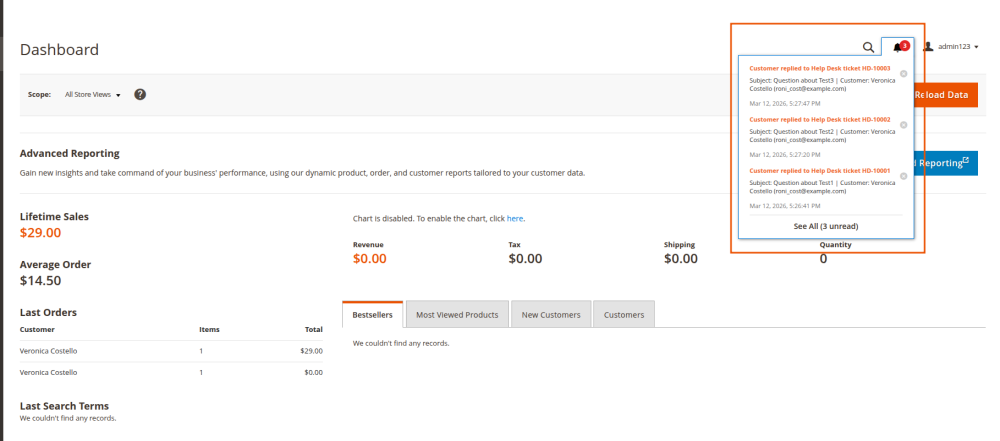
7. Notifications
- New tickets can trigger admin notification emails.
- Admin replies can trigger customer notification emails.
- Customer replies can also create admin panel inbox notifications if enabled.